There’s something so comforting about mixing creamy cheese with the briny tang of dill pickles. I first made these Dill Pickle Cheese Balls on a chilly weekend afternoon when I was craving something savory and satisfying. I wanted a snack that was rich, bold in flavor, and easy to pull together with ingredients I already had in my kitchen. One bite in, I knew this was going to be a go-to recipe in my household.
Whether you’re planning a game night, putting together a holiday appetizer spread, or just want a snack that packs a punch, these cheesy little bites are a guaranteed hit. Best of all? You don’t need to turn on the oven. Just mix, roll, chill, and enjoy!
Why You’ll Love This Recipe
1. Bold, Tangy Flavor: The combination of dill pickles, sharp cheddar, and creamy cheese gives each bite a mouthwatering punch of flavor pickle lovers will adore.
2. No Cooking Required: This is a no-bake, minimal-prep recipe. It’s perfect for when you want something quick and tasty without firing up the stove or oven.
3. Great for Any Occasion: These cheese balls make a great appetizer for holidays, parties, potlucks, or even a weekday snack. They’re easy to transport and serve.
4. Customizable: Whether you want to add a spicy kick or make it vegetarian-friendly, this recipe adapts well to different preferences.
5. Make-Ahead Friendly: These cheese balls can be made ahead of time and chilled until ready to serve, making party prep even easier.
Ingredients & Substitutions
Here’s a closer look at what goes into these Dill Pickle Cheese Balls and what you can substitute if needed:
Cream Cheese (8 oz, softened): This forms the creamy base and helps everything stick together. Be sure it’s softened for easier mixing. You can substitute with a dairy-free cream cheese if you’re avoiding dairy.
Shredded Cheddar Cheese (1 1/2 cups): Sharp cheddar adds bold flavor and a good texture. You can use mild cheddar or even pepper jack for a bit of spice.
Dill Pickles (1/2 cup, finely chopped): The star of the show! Use crunchy, full-flavor dill pickles. If you prefer a sweeter note, you could swap in bread-and-butter pickles, but the tanginess of dill is what makes this recipe pop.
Dill Pickle Juice (1 tablespoon): A splash of pickle juice adds moisture and enhances the briny flavor. Don’t skip it. If you’re out of pickle juice, a bit of white vinegar with a pinch of salt can work in a pinch.
Fresh Dill (1 tablespoon chopped, or 1 teaspoon dried): Fresh dill gives a bright, herbaceous lift. Dried dill is a fine substitute but use less, as it’s more concentrated.
Garlic Powder (1/2 teaspoon): Adds a subtle savory base. You can also use fresh minced garlic if you prefer a stronger garlic flavor.
Onion Powder (1/4 teaspoon): Balances the flavor and adds a hint of sweetness. A small amount of grated fresh onion can also work.
Black Pepper (1/4 teaspoon): A touch of pepper enhances the flavor without overpowering the other ingredients.
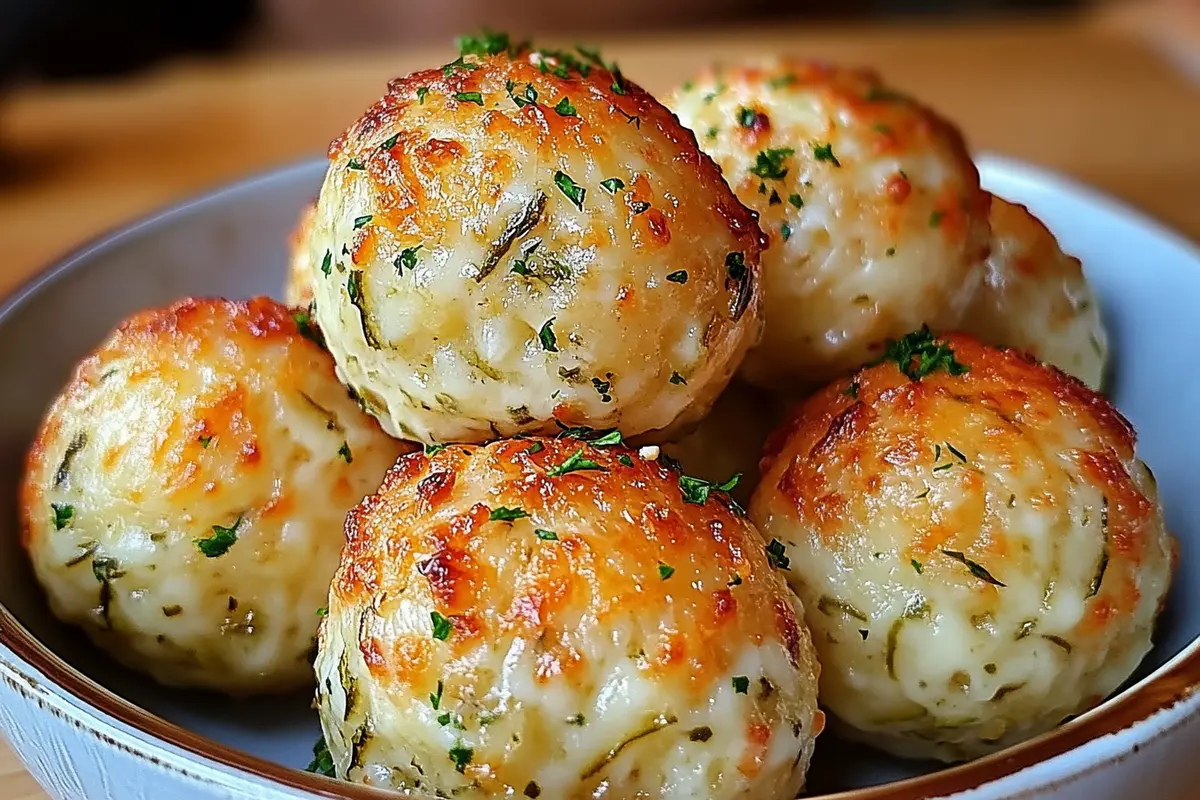
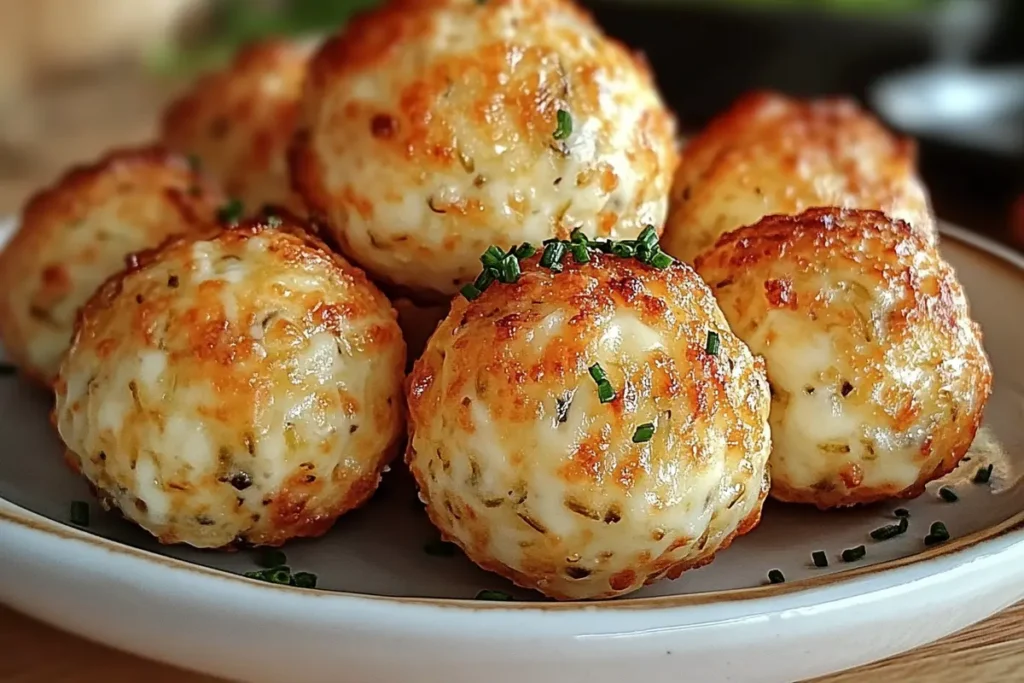
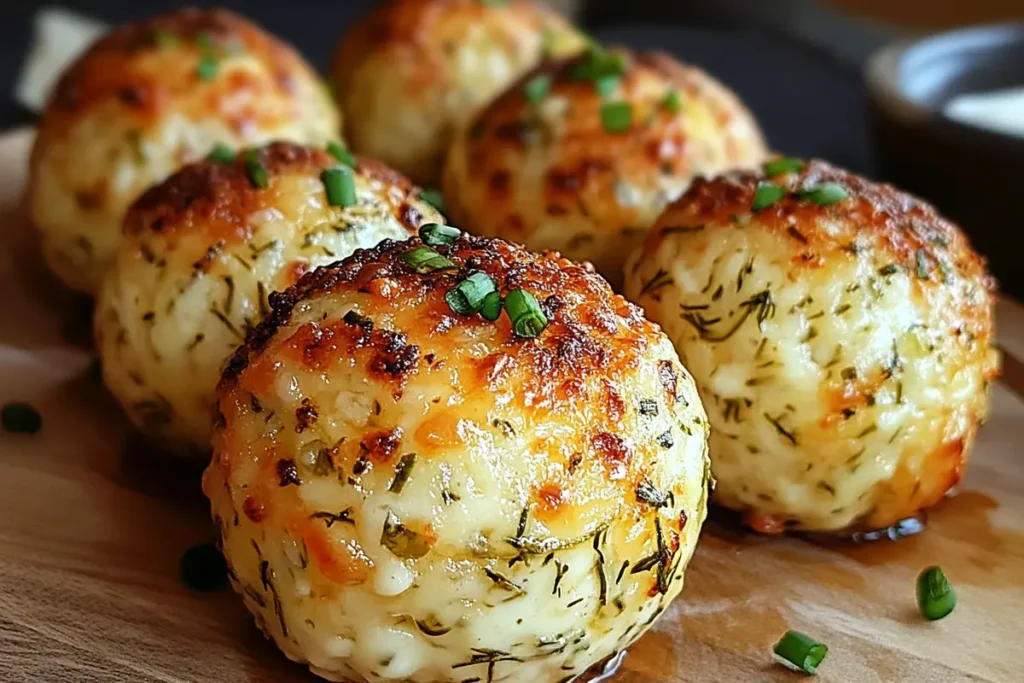
Mozzarella or Parmesan Cheese (1/2 cup for coating): This gives the cheese balls a beautiful exterior and an extra boost of flavor. Mozzarella keeps it creamy, while Parmesan adds a salty, nutty bite.
Step-by-Step Instructions
Follow these easy steps to make perfect Dill Pickle Cheese Balls every time.
Step 1: Prepare the Cheese Mixture
In a large bowl, combine the softened cream cheese, shredded cheddar cheese, finely chopped dill pickles, pickle juice, chopped fresh dill, garlic powder, onion powder, and black pepper.
Mix thoroughly using a rubber spatula or a hand mixer on low speed until everything is well combined and evenly distributed. The mixture should be thick and moldable.
Step 2: Shape the Cheese Balls
Use a tablespoon to scoop out portions of the mixture. Roll each scoop between your palms to form balls about the size of a golf ball.
If the mixture feels sticky, lightly dampen your hands with water to make rolling easier.
Step 3: Coat the Cheese Balls
Pour the shredded mozzarella or Parmesan cheese into a shallow bowl.
Roll each cheese ball in the shredded cheese until fully coated. Press gently so the coating sticks well.
Step 4: Chill
Place the coated cheese balls on a plate or tray lined with parchment paper.
Refrigerate for at least 30 minutes to allow them to firm up and hold their shape. You can also chill them longer or overnight if preparing ahead of time.
Step 5: Serve
Serve the dill pickle cheese balls chilled or at room temperature.
Pair with crackers, pretzels, breadsticks, or sliced veggies like celery and bell peppers.
These cheesy bites also look great on a charcuterie board or appetizer platter.
Additional Tips & Variations
Add a Spicy Twist: Mix in chopped jalapeños or a dash of cayenne pepper for a little heat. A bit of hot sauce stirred into the cheese mixture works great too.
Make Mini Cheese Balls: Instead of golf-ball-sized portions, roll smaller balls for bite-sized finger food that’s ideal for parties.
Use Nuts for Coating: Instead of shredded cheese, coat the balls in crushed pecans, walnuts, or almonds for extra crunch and flavor.
Refrigeration & Storage: Store cheese balls in an airtight container in the refrigerator for up to 5 days.
If you’re making them ahead, don’t coat them until just before serving to prevent moisture from softening the outer layer.
Freezing: Cheese balls can be frozen before coating. Freeze on a baking sheet until solid, then transfer to a freezer-safe container. Thaw in the refrigerator and roll in the coating before serving.
Looking for more crowd-pleasing appetizers? Try our yummy bowl recipes for another easy and delicious bite.
Frequently Asked Questions
Can I make these Dill Pickle Cheese Balls ahead of time?
Yes! These cheese balls can be made up to 2 days in advance. Store them in an airtight container in the fridge until you’re ready to serve.
What kind of pickles should I use?
Classic dill pickles work best, but you can use any pickle with a strong briny flavor. Avoid sweet pickles unless you want a different flavor profile.
What can I use instead of cream cheese?
If you’re dairy-free or looking for a lighter option, you can try using dairy-free cream cheese or a thick Greek yogurt, though the consistency may be slightly softer.
Can I make a large cheese ball instead of mini ones?
Absolutely! Simply shape the mixture into one large ball, coat it, and chill. When ready to serve, place it on a platter with crackers or veggies.
Are these keto-friendly?
Yes, as long as you serve them with low-carb dippers like celery, cucumber slices, or keto-friendly crackers.
Conclusion
These Dill Pickle Cheese Balls are everything you want in a snack: cheesy, tangy, creamy, and satisfying. They’re quick to make, easy to customize, and always a crowd-pleaser. Whether you’re throwing a party or just looking for something unique to nibble on, this recipe delivers big flavor in a small, snackable package.
Give them a try next time you’re in the mood for something different. They might just become your new favorite appetizer!
Print
Dill Pickle Cheese Balls
- Total Time: 45
Description
Creamy, tangy, and bursting with flavor, these Dill Pickle Cheese Balls are the ultimate party appetizer or savory snack. Made with a blend of cream cheese, sharp cheddar, chopped dill pickles, and herbs, each bite delivers a satisfying balance of bold, briny taste and smooth, cheesy texture. Rolled in shredded mozzarella or Parmesan for extra flavor and texture, these no-bake cheese balls are easy to make ahead and perfect for serving with crackers, veggies, or breadsticks.
Ingredients
8 oz cream cheese, softened
1 1/2 cups shredded cheddar cheese
1/2 cup dill pickles, finely chopped
1 tablespoon dill pickle juice
1 tablespoon fresh dill, chopped (or 1 teaspoon dried dill)
1/2 teaspoon garlic powder
1/4 teaspoon onion powder
1/4 teaspoon black pepper
1/2 cup shredded mozzarella or Parmesan cheese (for coating)
Instructions
Step 1: Prepare the Cheese Mixture
In a large bowl, combine the softened cream cheese, shredded cheddar cheese, chopped dill pickles, pickle juice, fresh dill, garlic powder, onion powder, and black pepper. Mix thoroughly until well combined and smooth.
Step 2: Shape the Cheese Balls
Scoop out the mixture using a tablespoon and roll it into balls about the size of a golf ball. Lightly dampen your hands if the mixture is sticky.
Step 3: Coat the Cheese Balls
Place the shredded mozzarella or Parmesan cheese in a shallow bowl. Roll each cheese ball in the shredded cheese until fully coated, pressing lightly to help the coating stick.
Step 4: Chill
Arrange the coated cheese balls on a plate or tray lined with parchment paper. Refrigerate for at least 30 minutes, or until firm.
Step 5: Serve
Serve the chilled cheese balls with crackers, breadsticks, pretzels, or sliced veggies. These cheese balls also work great on a charcuterie board or appetizer platter.
Notes
Softening the Cream Cheese: Let the cream cheese sit at room temperature for about 30 minutes before mixing for easier blending.
Fresh vs. Dried Dill: Fresh dill has a brighter flavor, but dried works just as well. Use 1 teaspoon dried dill if fresh isn’t available.
Make-Ahead Tip: You can prepare the cheese mixture up to 2 days in advance. Form and coat the cheese balls just before serving for best texture.
Storage: Store leftovers in an airtight container in the refrigerator for up to 5 days.
Freezing: Uncoated cheese balls can be frozen on a tray, then transferred to a container or bag. Thaw in the fridge and coat before serving.
- Prep Time: 15
- Cook Time: 30